Integrating using the Merchant API
To integrate using the Merchant API, you simply set up your payment page to call the createPaymentRequest method, and set up your callback pages.
Initially, you will typically be working against the test environment/gateway. Once your integration is ready, it can be put into production. We use different subdomains, so you should prepare your code so that you can target another URL once the code is ready to be placed into production.
- Work through the steps in Getting Started with your Integration to familiarise yourself with the createPaymentRequest method.
- Set up your checkout page so that it calls createPaymentRequest with the relevant order information and customer information.
- Set up your callback pages (for example, ok, fail, open, and notification) to handle the business logic of the payment. The URLs to the callback pages are passed as parameters on the API call to the createPaymentRequest method.
- Use the Merchant Information Interface for post-processing, such as capturing and releasing reservations, or downloading funding lists.
For more information, see createPaymentRequest.
For more information, see Setting up the callback pages.
For more information, see Using the MII.
Alternatively, you can integrate the Merchant API for the post-processing tasks.
For more information, see Merchant API Methods.
Getting Started with your Integration
This is a brief "how to" guide, to get you started with your integration, telling you how to manually create a payment request, then capture it, and finally view the XML response of the capture.
Before you get started, make sure you have:
- access to the test gateway at https://testgateway.altapaysecure.com or https://onl.prepod.mpg.market-pay.com
- your user name and password
Create a new payment
- Log in to the Merchant Information Interface.
- Click Home > Terminal Settings. This shows you all of the shops and terminals within your area. Ensure that the correct shop is displayed, and then click on the tab for the terminal you want to use.
- Make a note of the terminal name. (The terminal name in the screenshot is Sander Improvement Software AB Test Terminal.)

- Make a HTTP POST request - using basic auth - with minimum required parameters (terminal, shop_orderid, amount, currency). We'll provide an example using cURL which can be used from the command line of any operating system.
From the following example replace USERNAME, PASSWORD and YOUR_TERMINAL_PLACEHOLDER before making the request: (the username and password should be the same you use to log in to testgateway)curl -u "USERNAME:PASSWORD" -L -X POST 'https://testgateway.altapaysecure.com/merchant.php/API/createPaymentRequest' \ -d 'terminal=YOUR_TERMINAL_PLACEHOLDER' \ -d 'amount=250' \ -d 'currency=EUR' \ -d 'shop_orderid=0001'
The XML result is returned.
- Copy and paste the resulting <Url> value into the browser.
- On the payment page, enter the following details:
card number 4111111111111111 expiration date pick a valid date CVC code 123 - Submit the payment. The default success page is displayed.
- Log in to the Merchant Information Interface again, and click Operations > Search.
- Select your test terminal from the Terminal drop-down menu and click the Apply button to list all transactions.
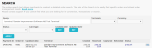
- Make a note of the Payment ID.

<Url>
https://testgateway.altapaysecure.com/eCommerce/API/requestForm?pid=1459b46a-9abe-4636-a0cf-2553b6e762e4
</Url>
Capture the payment and view the XML response
- As before, make a POST HTTP request to the testgateway, replacingPAYMENTID with the Payment ID of the transaction you just created:
curl -u "USERNAME:PASSWORD" -L -X POST 'https://testgateway.altapaysecure.com/merchant.php/API/captureReservation' \
-d 'transaction_id=PAYMENT_ID'
- The XML response is displayed, showing you details about the captured payment.
You have successfully created a payment request, and captured the resulting reservation. You can also use the Merchant Information Interface to capture reservations. For more information, and instructions, see Capturing and Releasing Payments.
Next Steps
Next, you need to:
- Set up your checkout page so that it calls createPaymentRequest with the relevant order information and customer information.
- Set up your checkout page so that it calls createPaymentRequest with the relevant order information and customer information.
For more information, see createPaymentRequest.
For more information, see Setting up the callback pages.